

We have registered the Shopify store in last post, now we will start to set up the store.
- Set the Domain Name of the Store
- Configure Your E-mail
- Select the Theme
- Create the Necessary Page
Set the Domain Name of the Store
Domain names can be useful to customers, it can bring them a professional store image and checking how ULR are read.
Purchasing domain name can establish the store image and facilitate promotion. First, you should click on the “domain” option in the online store and fill in your domain name.
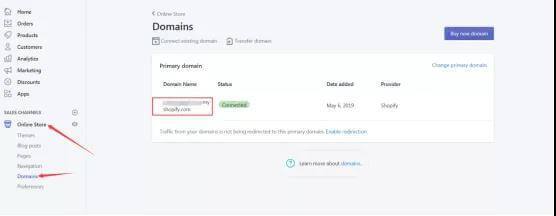
Type and remember your domain name in your browser to make it easier to use.
Well, having said that, how do you buy a domain name? You can buy new domain names from third-party providers such as NameCheap or GoDaddy.
Buying a domain name from a third-party service can prevent you from moving to an online store in the future. GoDaddy is the largest domain name registrar, and Namecheap offers competitive pricing and customer service.
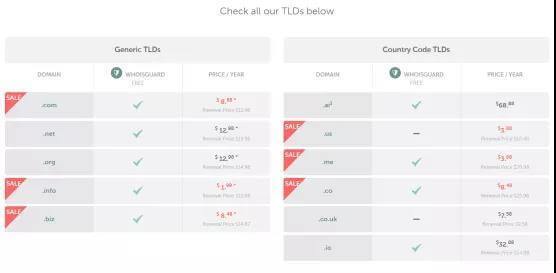
NameCheap charges $8.88 a year for.com domains and $12.98 a year for.net and.org domains.
The best thing about NameCheap is that it comes with a free WhoisGuard ( formerly $15 a year) that helps hide the identity of the domain owner.
After the purchase of the domain name on the third-party platform, do a DNS resolution and point it to shopify. If you don’t know what a virtual host is, then you can buy directly in Shopify, and then automatically add to your store, which can save time and effort. In shopify, domain names typically cost $9-$14/ year.
Before buying the domain name, select this check box to indicate that you have agreed to ICANN policy and DRA.
Then buy it and you will receive an E-mail notification that you have made the purchase.
Configure Your E-mail
So, when selling your products on shopify, you are the middleman between suppliers and customers. In other words, if someone asks you to place an order, you manually transfer the order to the supplier, who then delivers the goods to the customer.
To set up the email transfer, go to the domain page and click the domain name you want to purchase.
On the next page, you will see two emails under your domain: info@ and sales@.
If you want to change sending all shopify emails and email addresses, you can make changes here, click the trash icon, you can delete the current email, then make sure.
If you want to add other E-mail messages ( such as changing customerservic @ or support @ ) , click “add address.” Enter your email address.
Select the Theme
The theme design of Shopify is the face of your store. It is necessary to ensure that the theme can be viewed on the mobile terminal and the computer terminal, which is in line with the popular aesthetic and convenient for users to operate.
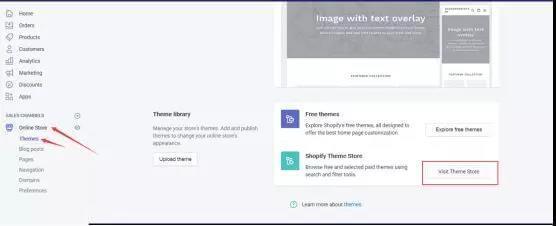
Shopify provides free themes and paid themes, which can be selected according to your own needs.

If you want to change the theme of your store, you can go to the store control panel to set it.
To browse and change topics, follow this step:
Login > theme > visit > theme store
After confirming install your theme, click publish to complete the changes. To install a theme without overwriting the current theme, click the publish as the store theme link.
Customize your new page with the “Theme Library” button, which takes you to the shopify page, and click the button to change the theme.
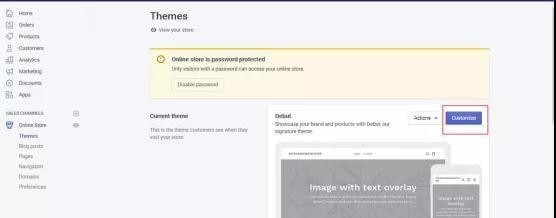
After clicking the “customize” button, you will go to a page where you can edit the theme.
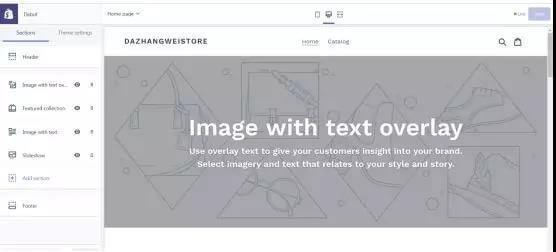
You can see many sections of the sidebar page to edit the site. Click on a section and you can see the various options you customize.
Create the Necessary Page
To tell shopify that you are building a store, you should create a page that informs visitors of the entire content of the page. It is recommended that you create the following page:
- About – Explain your store to visitors and suppliers, try to be rich and comprehensive.
- Products – Show the store’s products and collection list, explaining your product advantages.
- Shipping – Please note that the Shipping length for each order ( large or small) . Before the customer purchases, tell them the details of logistics mode, shipping and others of the store.
- Returns – Explain the Returns Policy. It tells the customer about the benefits and details of how you return items.
- Contact – In addition to the details above, you also need a Contact page to timely solve customers’ problems before and after purchase. Go to the pages section of the online store category and start adding new pages.

Click the “add page” button to create a new page in the store and choose the format of the text editor in different ways, easy to edit.
Edit “ABOUT” Page
Since you need more natural search engine traffic, change your SEO permissions for your pages. Click the Edit SEO website and scroll down. Edit meta titles and descriptions to attract more users to click when search results appear. Save the finished page.
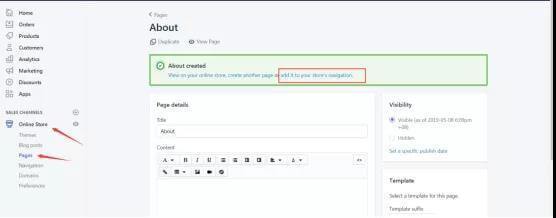
When you save the newly created page, click “add to navigation”, so that once the page is created, you go directly to the navigation page of the website, making it easy for visitors to view the page.

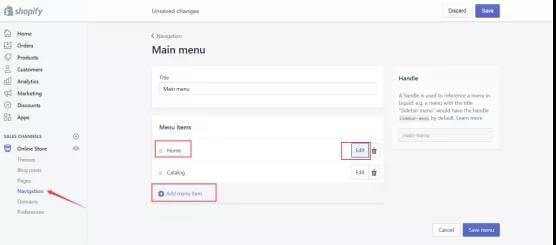
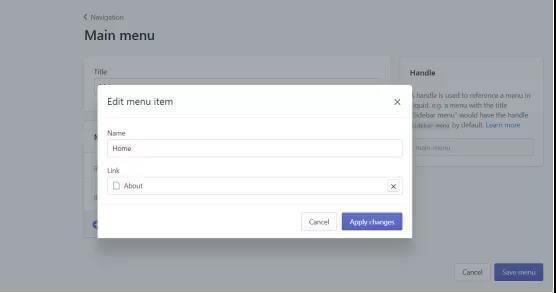
For example: Add the “about” page to the list at the top of the main menu page.
Step: Click the navigation of the online store, click “ add menu items” , edit the page name and link page here, and click “apply modification” after completing the modification.
Do this on all the pages of your website.