

Now, I would like to introduce how to register and set up a store on Shopify. Every step has detailed instructions and tips, trying to avoid all kinds of traps, you can finally successfully register a store of your own and start making money.
The registration process of Shopify is actually very simple, but it is easy to fall into a trap if you do not pay attention to it. Many friends will find that the registered account is closed, which is really innocent!
1. Register Shopify Account
Address: https://www.Shopify.com
Open the URL and go to the Shopify homepage. At the top of the page, you will see an input box asking you to “Enter Your Email Address. ” And there was a tip saying “Try Shopify free for 14 days. No risk, and No credit card require”.
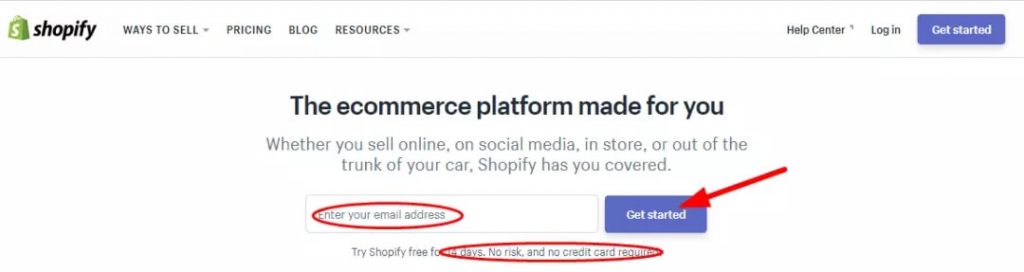
Enter your Email address. Click “Get Started” and it will jump to another page. You need to enter your Email address again, and create Password and Your Store Name.
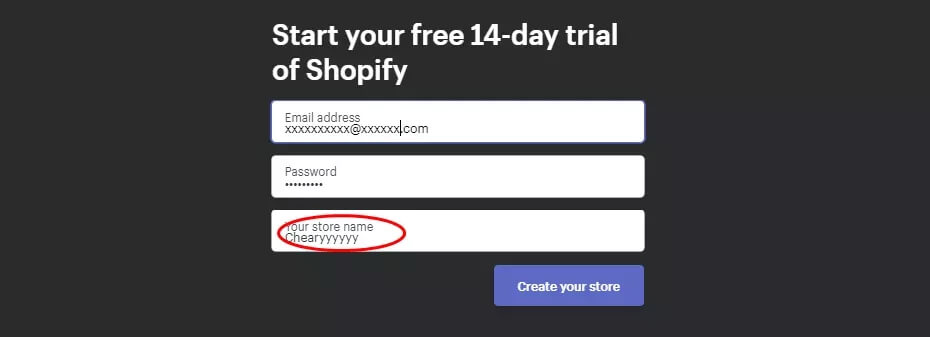
There are a few things to note when filling in Your store name:
1) Think of a good store name: simple and creative
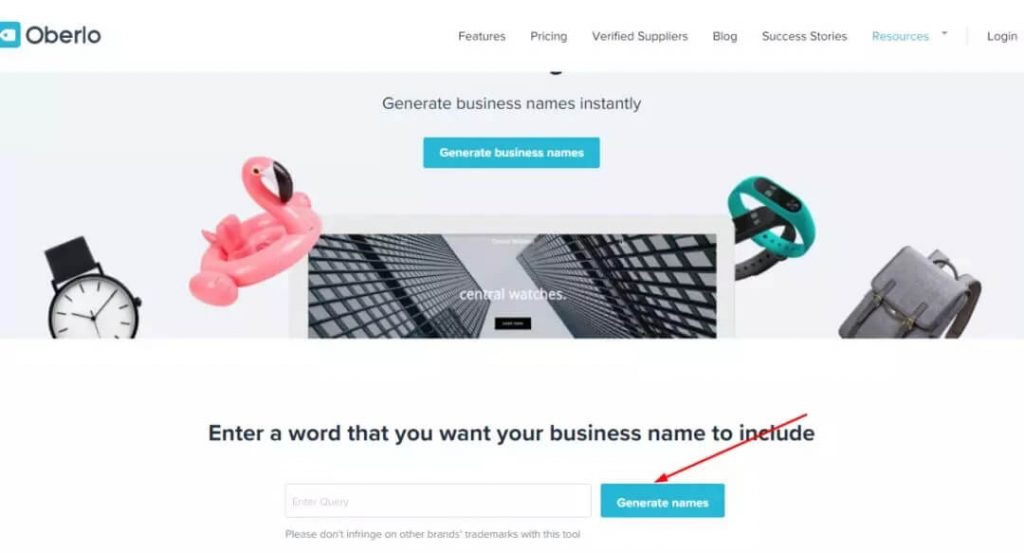
Oberlo App has the function of Business name generator.
Address: https://www.oberlo.com/tools/business-name-generator
You can type in any keyword you want to include, and click “Generate names” to generate a list of names that contain that keyword, from which you can pick a favorite one. In this way, you can save a lot of time and it’s completely free, as shown below:
2) The store name you input is the free secondary domain address of your Shopify store
For example, your store name is “Betterlife”, that your URL is “https://Betterlife.myShopify.com”
If there is a blank between two words, the domain will automatically fill with a ” – “, “Better Life” is the corresponding “https://Better-Life.myShopify.com”
We do not recommend you to use better-life, a domain name with ” – ” will make it look very, very unprofessional.
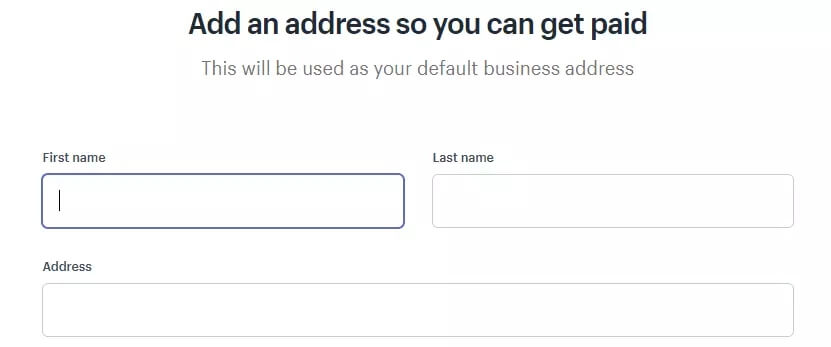
Once you’ve filled in the information for this page, click “Create your store” to go to the next page and fill in your address information. Use real information as much as possible. You don’t need to fill too detailed.
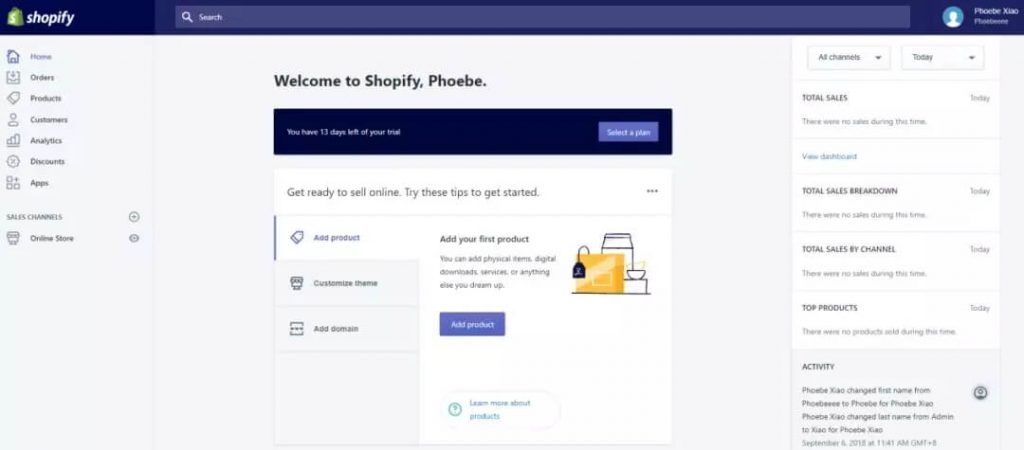
After filling in the above information, you will jump to Shopify’s background page, and you have already registered your Shopify account.
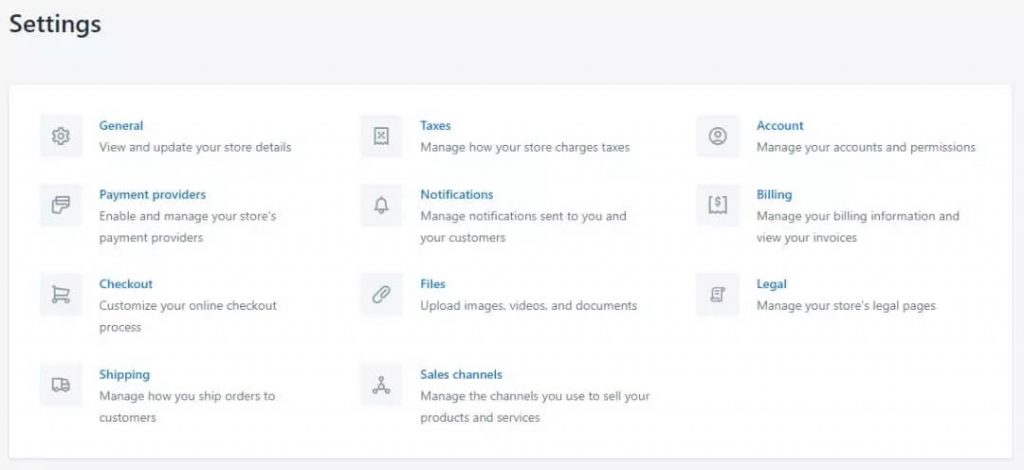
2. Set Account Information
After successfully registering the Shopify account, the next step is to set the account.
The information you can set includes:
- general
- taxes
- account
- payment providers
- notifications
- billing
- checkout
- files
- legal
- shipping
- sales channels
Too many functions, here is not one by one, I will pick a few key points to explain:
General
Click “Settings” at the bottom of the page to display the Settings page. Then click “General” to enter the basic Settings. This information is filled out at the beginning of registration, as shown in the picture below.
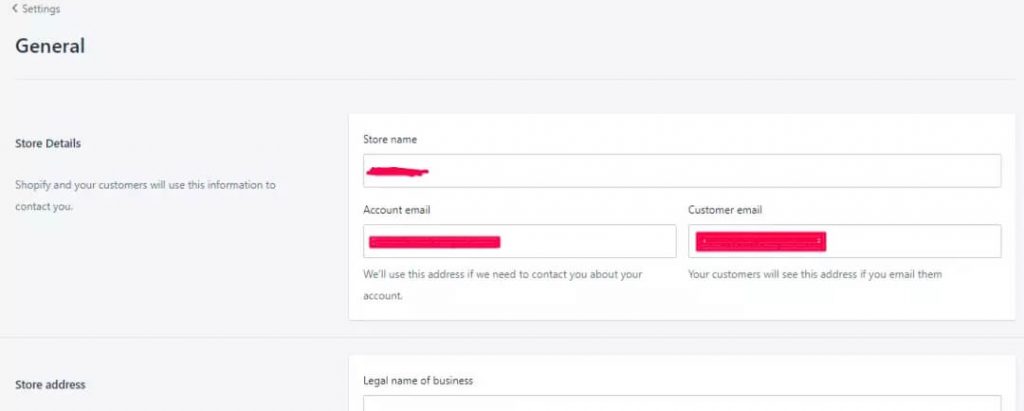
There are four content changing setting in General Settings:
- Store Details
- Store address
- Standards and formats
- Store currency
Payment Providers
It is a very important step to set up a payment method for the store, it is related to money after all.
Go back to the “Settings” page, and click on “Payment Providers”.

There are two basic pieces in the Payment Settings:
- Accept payment
- Payments authorization
There are four payment methods to choose from:PayPal, Accept credit cards, Alternative payments, Manual payments.
I recommend PayPal. If you don’t already have a PayPal account, it’s easy to sign one up in minutes. In addition, there are many online tutorials on PayPal and other payment methods.
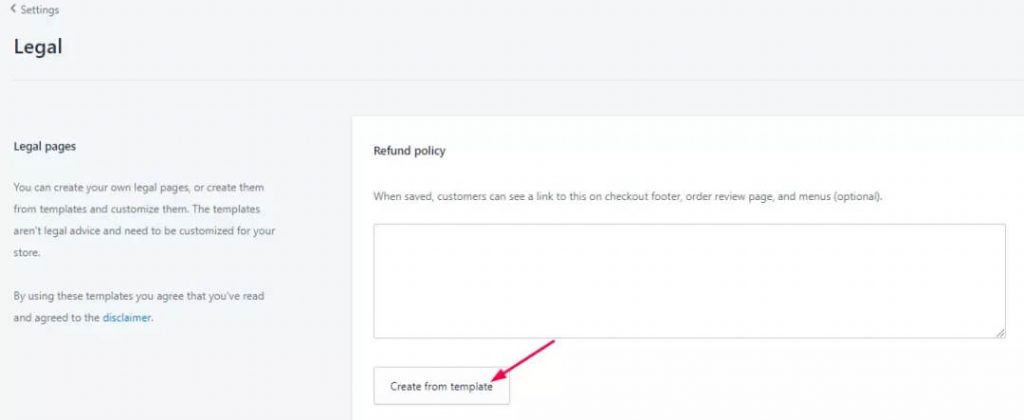
Store Policies
If you decide to open a shop on Shopify, you need to make relevant policies for your store.
There are three things: Refund policies, Privacy policies, and Terms of service. Shopify has created an automatic template generation function for sellers. Click “Create from template” and the template will be automatically generated.
Back to the “Settings” interface and click “Legal” to enter the store policy setting, as shown in the figure below.
Shipping
It is also important that the seller’s shipping costs are calculated in a clear way. But my suggestion is better to be “free shipping”, which is also the simplest way. The delivery place is different, so we have to calculate the freight every time, which is really troublesome.
Therefore, we can calculate the approximate shipping cost into the product price, and then free shipping, which is convenient. For example, if you are selling a T-shirt for $20, you can sell it for $25, free shipping. Also, “free shipping” is also a selling point.
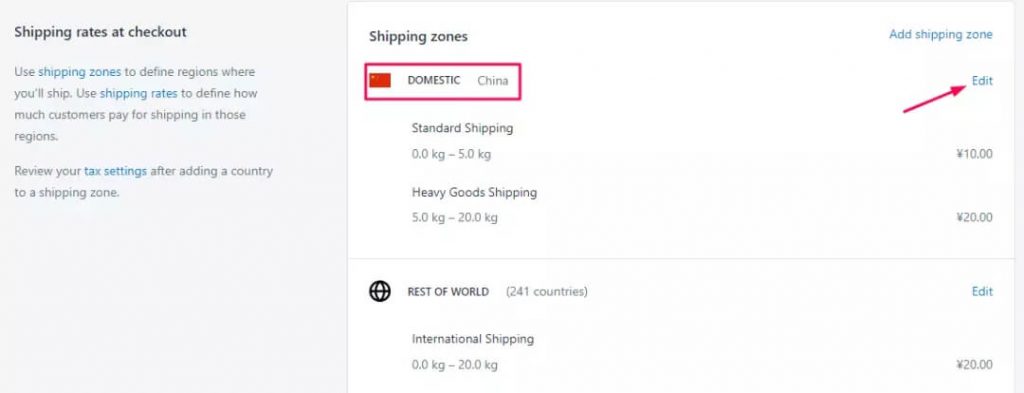
Go back to “Settings”, click “Shipping”, enter, then you can set free shipping.
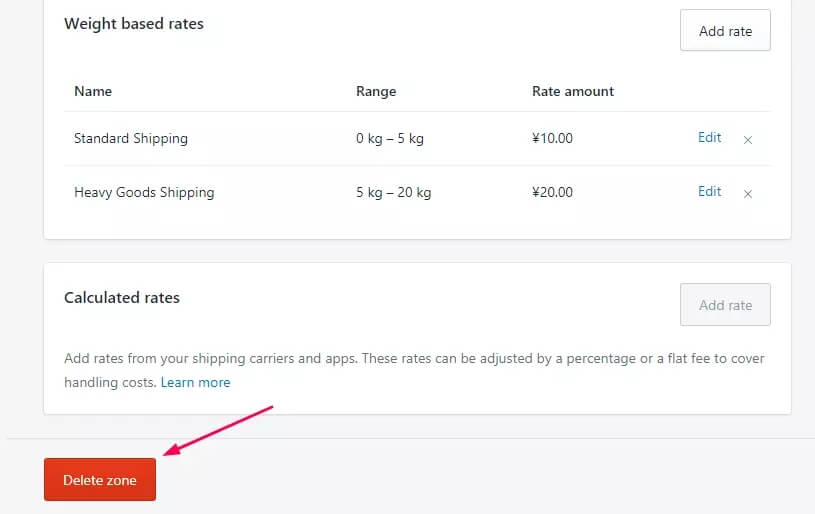
First, delete “domestic” shipping zones, click “Edit” to enter the Edit page, then slide to the bottom of the page and click “Delete zone”
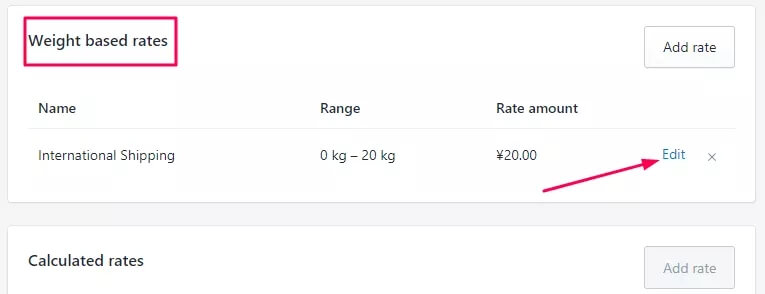
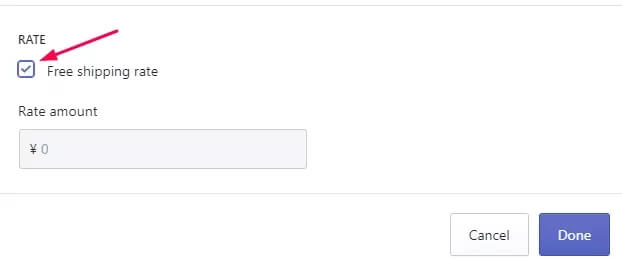
Then in the “Rest of world” section, click “Edit”, select “Edit” in the “Weight based rates” section, and tick ” free shipping rate” .
3. Start Operating the Store
Once all the necessary information is set up, you can start operating the store. How does it work? You can click the “+” beside “Sales channels”, and then you can choose the marketing method you want to add, as shown in the following picture.
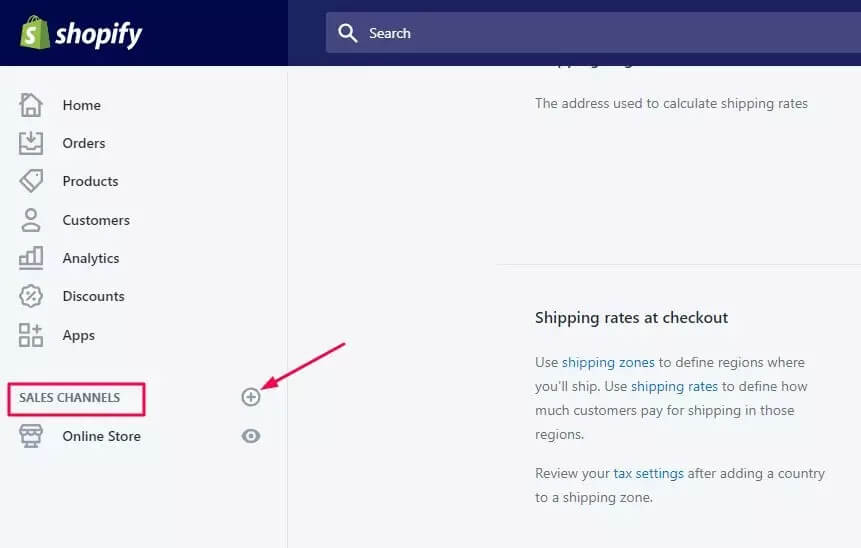
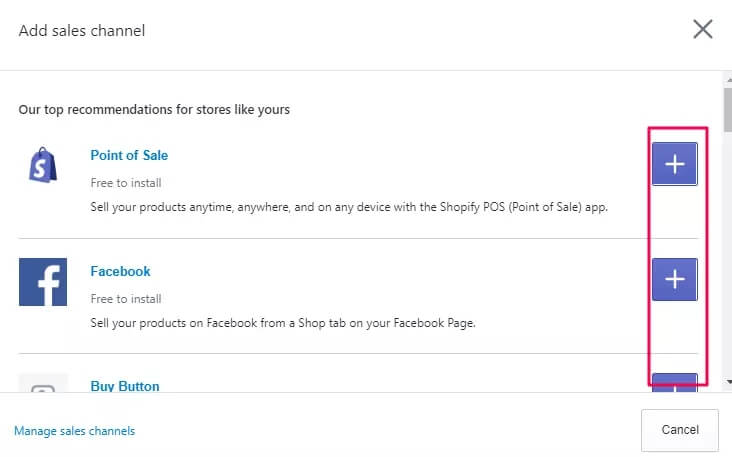
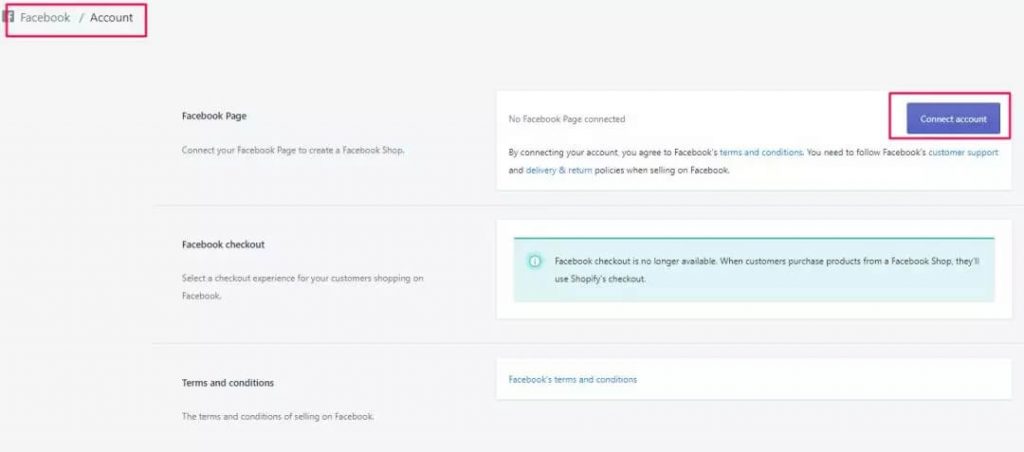
For example, if you’re a regular Facebook user, you can choose to add to Facebook to market your product. It depends on your Facebook account, of course.
4. Theme Design
In this part, we want to emphasize the importance of theme design and some points to pay attention to. The theme design of the store is very important because it shows your design concept and brand. Online Shop has a simple and beautiful style, just as the physical store has a very attractive window is important.
This determines the customer’s first impression of your store, and the first impression is very important, often determines whether the customer will enter the store. So it is necessary to study the shop design skills, maybe your sales will explode.
When it comes to store design, two aspects should be considered generally – Theme and Logo. You can take a look at this article, which may be helpful to you.
5. Use Oberlo to Choose Products
After the completion of shop design, then is time to upload products, with the product business can officially start.
Better to use Oberlo ( https://app.oberlo.com/ ) , an app “tailored” for Shopify. In this way, you can easily import product data into your store.
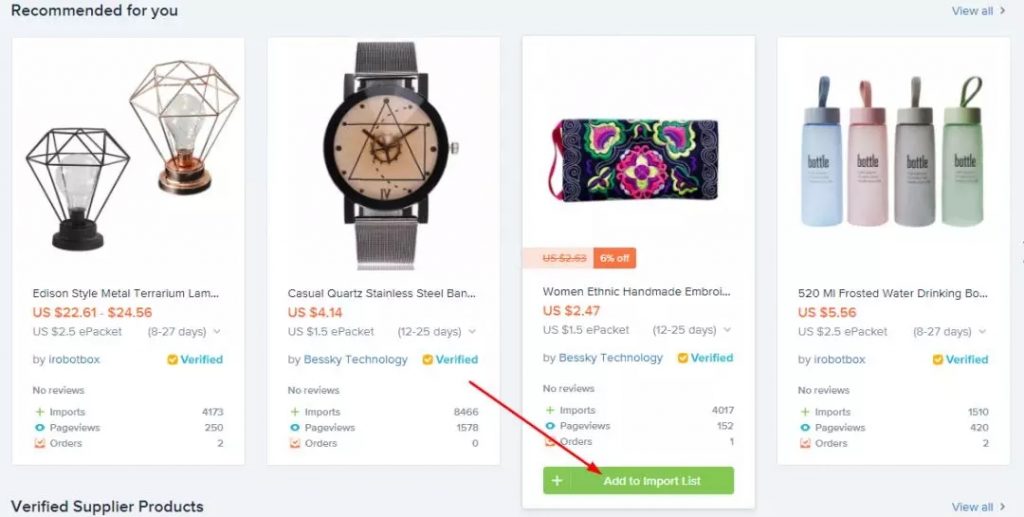
Log in Oberlo online, you can ” search for products ” and ” add to import list” , then ” link to your Shopify store ” , and import ” import list into the store ” . For specific operation, see the figure below.
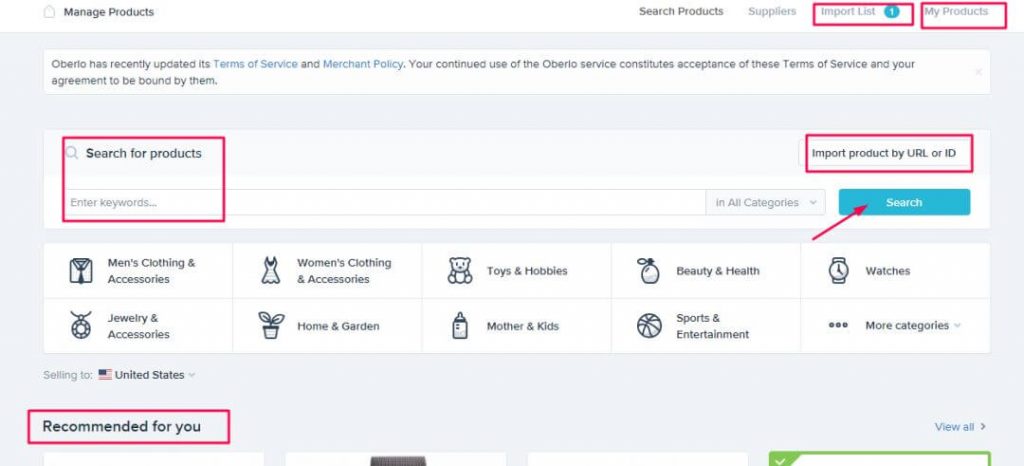

After that, “add product categories” to the store, preferably named after the product type. For example, if you have a store that sells T-shirts, it could be “T-shirts” . You may wonder what Oberlo offers.
Oberlo has two different types of suppliers:
- Oberlo certified suppliers;
- Oberlo suppliers and Aliexpress;
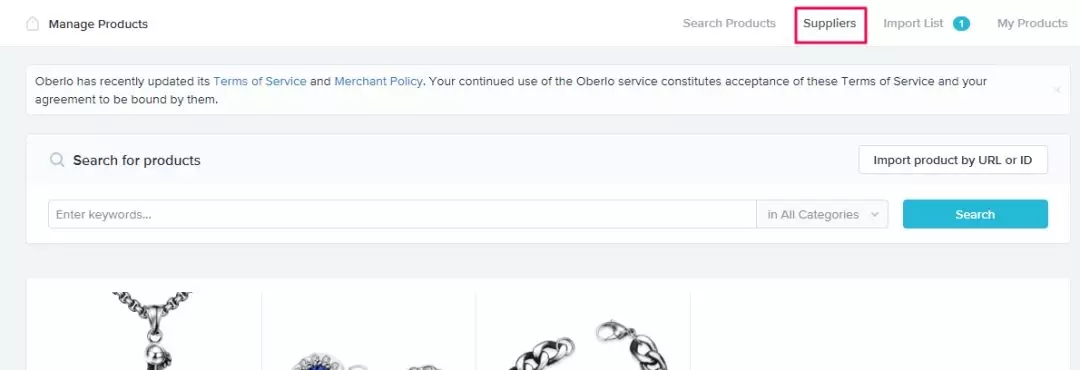
- Oberlo certified suppliers are selected quality suppliers, so you don’t have to worry about finding a good supplier. Click “Suppliers” and enter the keyword to find Suppliers.
- Oberlo suppliers and Aliexpress, where products are imported directly from Aliexpress with one click.
6. Conclusion
When all the preparations have been completed, we can start to operate the store.
Although the store is open, few people know about it at first. So, think about some exposure activities, more research on all kinds of marketing channels, and then find the most suitable for their own, to attract more traffic.
You can also research your competitors’ websites and find out how they operate, so you can take fewer detours.
In particular, Shopify works with Facebook now, so you can test some ads on Facebook.
The key is to keep testing, stick to testing for a period of time, you will find the most suitable marketing channels and plans, the order will be more and more.