

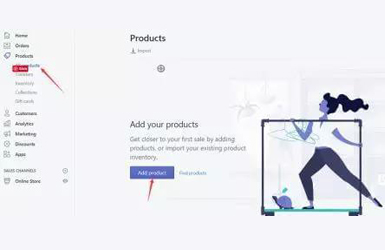
After configuring the basic settings of the store, click to get more, it is time to upload products to your store. Click “add products” to enter the add products page.
The Content Settings
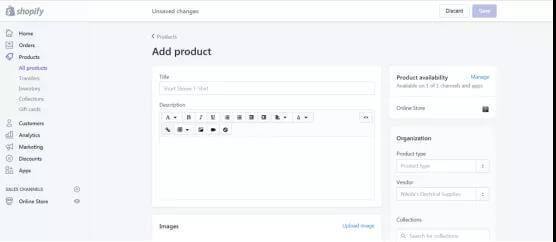
When you enter the product page, you should fill in the product details. You can also refer to the description provided by the supplier, edit and modify it to make it more attractive to the target market.
In the right-hand column, under the organization, modify product types and suppliers to classify products. You can also add this product to the collection so that similar products can be packaged together and presented to the customer in full.
Finally, type the keyword label for the product, and the user can find it in the search box.
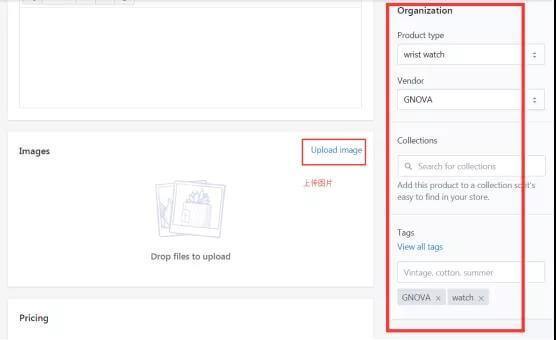
Below the title and description of the product is the area for uploading pictures. You can upload all pictures provided by the supplier. Ensure the quality of pictures.
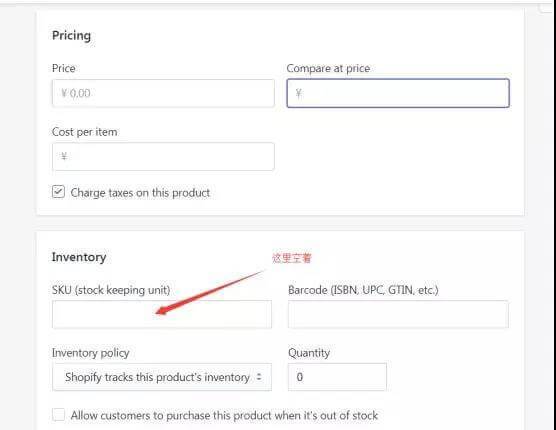
Enter the price based on your research. I compared the watches on Amazon and priced them at $20. You can consider reasonable pricing to increase profits.
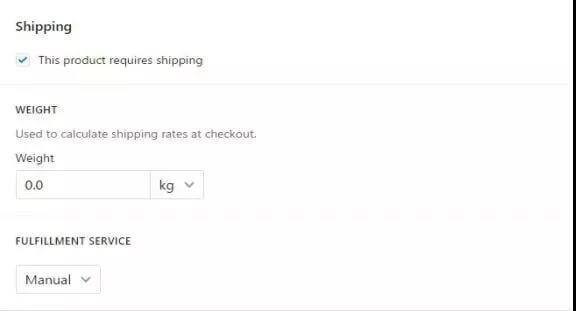
As for logistics, you can leave it blank and the supplier will manage it. However, you must negotiate with the supplier on how the order will be executed and on time for delivery.
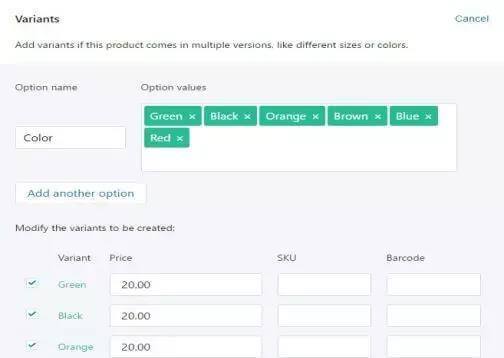
After you setting your delivery page, it’s the Variants page. You can set the Variants for the products here. By adding the color, size and other features of the variant product, the variant product increases the opportunities for people to choose, which is conducive to increasing the conversion rate.
Edit Website SEO
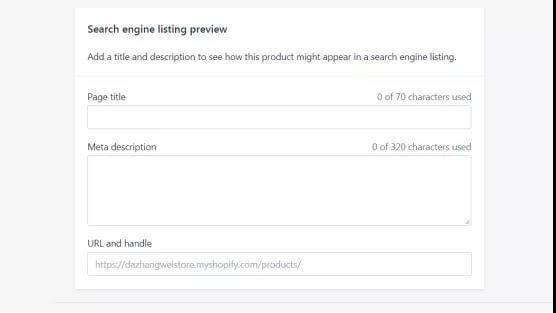
Finally, edit the list of search engines, click the “Edit Website SEO” link, in which you enter the title, meta description, and URL.
If the page title has enough characters, consider adding the name of your dropshipping store at the end. The description should be as detailed and engaging as possible.
In this way, customers might click on your link while browsing the search results. You can actually edit URL and use bitly to shorten them to short links. Also you should consider the keywords used to optimize the product page.
You can use SEM Rush to find keywords that are easy to score and increase your chances of getting more ratings on Google or Bing. Save the product when you’re done.
This is a series of procedures for uploading products in Shopify, in which other products can be added.
Products Are Automatically Added To The Collection
The benefit of creating a collection of goods is that you can separate products linked by the same brand, type, theme, or other factors.
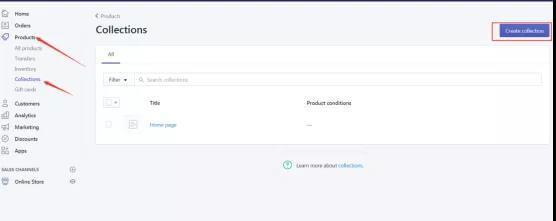
Enter the name and description in the first half of the “collection” page, consistent with the vendor’s description. To provide users with adequate product information, as detailed and substantial as possible.
Then all products should have product drawings, and the quality of the pictures should be ok. The newly created product page is automatically added to the collection based on specific conditions to make it easier to add the product to the collection.
You can choose between product type, price, seller, label, and other items, so your collection doesn’t need to be added manually.
Collection can contain a product from multiple criteria. Finally, don’t forget to edit the SEO page to attract more people to click on the search results link. Click the Save Collections button when you are finished.
Conclusion
After uploading the product, please check the details and do not miss anything.